Baking bread in a Dutch oven is easier than you’d think! With just a few ingredients mixed together right in your cast iron pot you’ll have homemade bread in no time. You can make a whole loaf or make homemade Dutch Oven Biscuits in it too.

Ever thought about Dutch oven bread??!! If you love a fresh round loaf of homemade white bread, this might be your favorite Dutch oven recipe made in your favorite cast iron pot. (affiliate links present)
Dutch Oven Bread
If you’ve only thought about baking bread at home but never tried it because you thought it would be too hard, this is a good way to start. With just 6 simple ingredients and some water you too can be a true baker.
You don’t even need a second bowl to dirty, just use your cast iron pot for everything, I love that. Baked in your oven or over a campfire there is nothing better than a slice of homemade white bread with dinner or made into toast. If you loved our Dutch oven corned beef and cabbage this is a great duo.
Baking Bread in One Pot
So you’re totally new to baking but you desperately want to try it and be successful. Don’t worry, we have shared a whole bunch of different homemade bread recipes with yeast on our site. I am not a huge complex baker type and needed a lot of easy step by step directions myself at the beginning.
I get where you are coming from so that is how I explain things, as though I was still new to it all too. Grab your favorite cast iron baby and give this a white bread recipe whirl with your kids. They will love it too.

Cast Iron Dutch Oven Bread
Question is: Do I need a Dutch oven? Yes, yes you do my friend! It is truly a magical piece of cookware I tell you. Every home cook should own one!
- Every one needs to be well seasoned just like other cast-iron piece of cookware.
- Most come “seasoned” so you can use it from the get go.
- From there you should always keep in mind how to take care of cast iron pans so you don’t ruin them.
To make dutch oven bread you’ll want a 6 quart pot like this one. Some cast iron dutch oven models are just black and others have brilliant colors on the outside as you see here. It is up to you which you choose, they will all work just fine.
- Similar to making bread in a bag, you only need your pot and a lightly floured cutting board or surface to make white bread this way.
- This one uses wheat flour so if you want that taste I would try this one as well.

Homemade Bread in a Dutch oven
That is right! Don’t bother with dirtying another bowl to mix your ingredients, just stir them together right inside of your pot. NO need for plastic wrap for it to rise and double in size either. Just use your lid y’all!
- All purpose flour
- Water
- warm and room temperature
- Vegetable oil
- Salt and yeast
- Wooden spoon
- Work surface such as a cutting board to knead your bread dough
Baking in a Dutch oven
- If you have never worked with active dry yeast before you’re going to want to make sure you have warm water to activate it. That means it needs to sit together for a bit to become a bit frothy.
- No cooler than 105 F yet not hotter than 115 degrees is the temperature you want and need for this to happen.
Here’s a rundown below of how you do just this. There is a printable recipe card at the bottom of this post as well for you.
Best Dutch Oven Bread Recipe
When it comes to kneading you can of course use a cutting board but just make sure it is nonstick as a surface can be. You can add a pinch of flour to do so as well but just note that the more you use the drier your final outcome will become. If you have a quartz countertop like ours, I would just use that.
- In your dutch oven, add 1/4 c. warm water, sugar and yeast. Stir and let sit for 10 minutes or until yeast becomes frothy.
- While you’re waiting for this to occur warm your milk on the stovetop in a pot. Once yeast is frothy pour this warm milk into your dutch oven with your cup of warm water.
- Add vegetable oil and salt into dutch oven too and stir together.
- Add 2 cups of your flour and mix together. Then add in remaining flour one cup at a time until it sticks together in a ball.
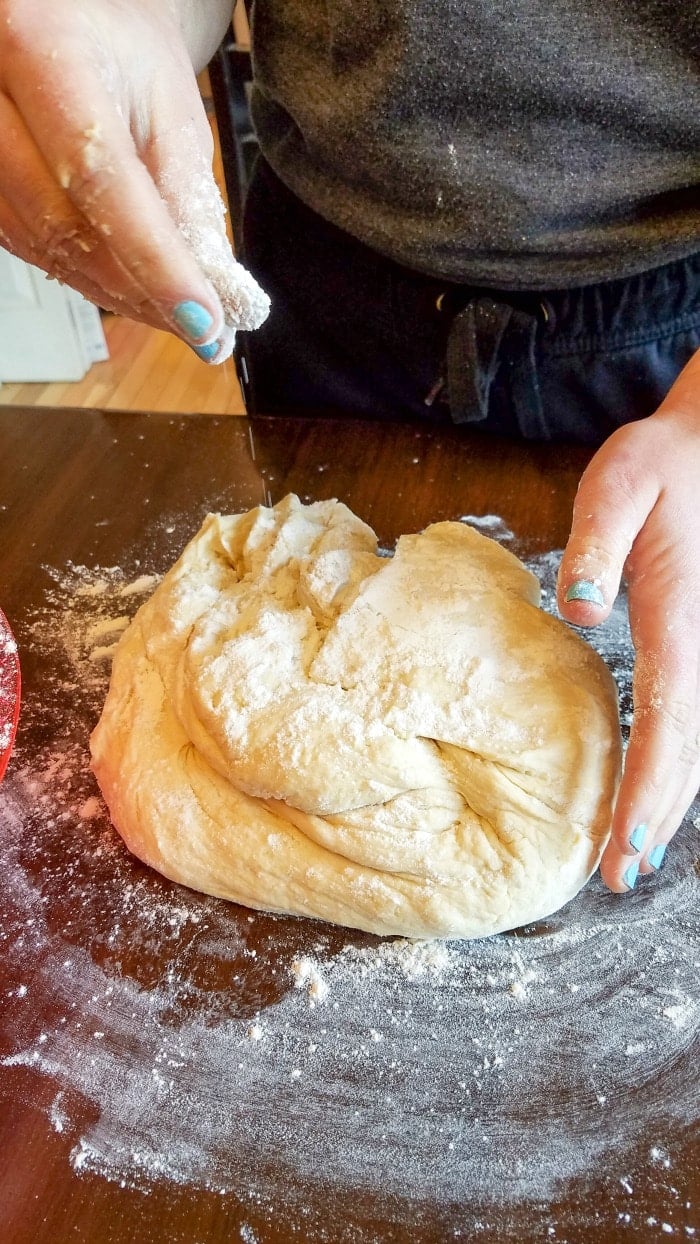
Now remember to measure flour properly, this is very very important in regards to baking anything. Never scoop with a measuring cup, rather use a spoon to aerate it as you fill the cup and never pat down. Remove dough, place on lightly floured surface and knead together 10-12 times. Let it sit undisturbed for 10 minutes.
Lodge Cast Iron Bread
Then knead again for 5 minutes or until it is smooth and elastic. Dough should bounce back when pressed with your fingers at this point. You can see the color and texture a bit with this photo above.
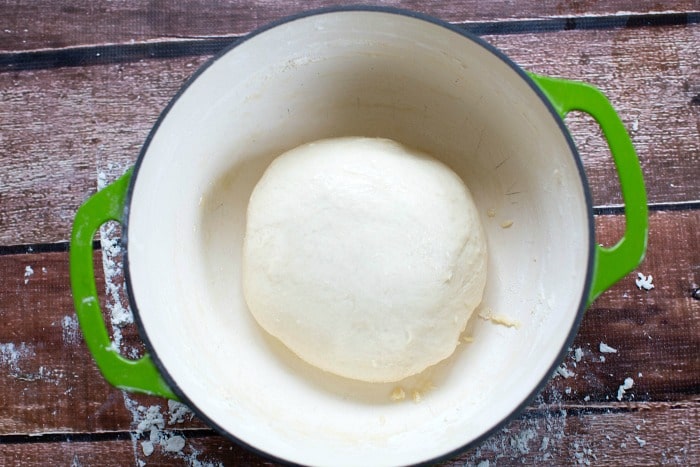
- Pour a small amount of oil into dutch oven. Rub top of dough into oil to grease inside of oven. Then place ito center and cover with your lid.
- Let this dough rest for 60-90 minutes so the dough has doubled in size.
- Lift lid, punch in center and form into a ball again. Set in center and cover again for second rise for 30 minutes.
- Now preheat your oven to 425 degrees.
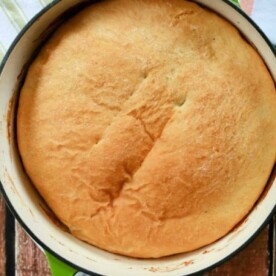
- After 30 minute rise put dutch oven into oven with lid on for 15 minutes.
- Then lower heat to 375 degrees and bake for 30 more minutes.
- Remove from oven, allow to cool completely on cooling rack before slicing
- Pour a small amount of oil into your pot and place ball of dough in the center.
- Put lid on and allow dough to rise covered for 60-90 minutes or until it has doubled in size.
Lift lid once it’s doubled, punch dough in the center, form into a ball again and close lid for another 30 minutes to rise for a second time. Baking times may vary due to altitude. Carefully remove loaf, place on cooling rack and do not slice until it is fully cooled.
Once you take a bite you won’t have to ask are Dutch ovens worth it? You will agree that for this and making Dutch oven stew is a hit too.

How to Activate Yeast
Activating active dry yeast is a crucial step in many bread and yeast-based recipes to ensure that your yeast is alive and active. Here are some tips for activating active dry yeast successfully:
- Always check the expiration date on your yeast package. Expired yeast may not activate properly and won’t cause your dough to rise.
- Dissolve the yeast in warm liquid (usually water or milk) between 105°F and 115°F (40°C to 46°C). Use a kitchen thermometer to check the temperature. It should feel warm to the touch but not hot. If the liquid is too hot, it can kill the yeast, and if it’s too cold, the yeast may not activate.
- You can add a pinch of granulated sugar to the warm liquid before adding the yeast. The sugar provides food for the yeast to consume and can help kick-start the activation process.
- Sprinkle the yeast evenly over the warm liquid and let it sit for a few minutes (usually about 5-10 minutes). Do not stir immediately. After a few minutes, gently stir the mixture until the yeast is completely dissolved.
- As the yeast activates, it should start to form a frothy, bubbly layer on the surface of the liquid. This foam indicates that the yeast is alive and consuming the sugar, producing carbon dioxide gas. The carbon dioxide gas is what causes your dough to rise.
- Depending on various factors, including the freshness of the yeast and the temperature of the liquid, it may take longer for the yeast to activate. If you don’t see any foam after 10 minutes, don’t worry; give it more time.
- Using a glass or clear container to activate the yeast allows you to monitor the process more easily. You can see when the foam forms.
- While waiting for the yeast to activate, it’s essential to keep the liquid and yeast mixture in a warm place. This encourages yeast activity. You can cover the container with a towel to trap warmth.
- If you suspect the yeast is not activating correctly, you can adjust the liquid temperature. If it’s too cool, gently warm it up a bit. If it’s too hot, let it cool down slightly before adding the yeast.
- Once the yeast is activated and has produced a good amount of foam, it’s ready to use immediately in your recipe. Don’t let it sit for too long before incorporating it into your dough or batter.
Properly activated yeast is essential for achieving a light and airy texture in bread, rolls, and other yeast-based baked goods. By following these tips, you can ensure that your yeast is alive and ready to work its magic in your recipes.
Yes it will take longer than 20 minutes like in your pressure cooker but many times low and slow is the way to deliciousness. Looking for other delicious and homemade bread recipes? Try our air fryer bread too.
Baking Bread in a Dutch Oven
Equipment
- 1 dutch oven
- 1 Bowl
Ingredients
- 2 tbsp sugar
- 1 tbsp active dry yeast
- 1/4 c water, warm
- 2 tbsp vegetable oil
- 2 tsp salt
- 1 c milk
- 1 c water, warm
- 5.5-6 c all purpose flour
Instructions
- In your dutch oven, add 1/4 c. warm water, sugar and yeast. Stir and let sit for 10 minutes or until yeast becomes frothy.
- While you're waiting for this to occur warm your milk on the stovetop in a pot. Once yeast is frothy pour this warm milk into your dutch oven with your cup of warm water.
- Add vegetable oil and salt into dutch oven too and stir together.
- Add 2 cups of your flour and mix together. Then add in remaining flour one cup at a time until it sticks together in a ball.
- Remove dough, place on lightly floured surface and knead together 10-12 times. Let it sit undisturbed for 10 minutes.
- Then knead again for 5 minutes or until it is smooth and elastic. Dough should bounce back when pressed with your fingers at this point..
- Pour a small amount of oil into dutch oven. Rub top of dough into oil to grease inside of oven. Then place ito center and cover with your lid.
- Let this dough rest for 60-90 minutes so the dough has doubled in size.
- Lift lid, punch in center and form into a ball again. Set in center and cover again for second rise for 30 minutes.
- Now heat your oven to 425 degrees.
- After 30 minute rise put dutch oven into oven with lid on for 15 minutes.
- Then lower heat to 375 degrees and bake for 30 more minutes.
- Remove from oven, allow to cool completely on cooling rack before slicing.
Video
Nutrition
Nutrition information is automatically calculated, so should only be used as an approximation.