
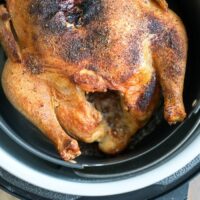
Our whole Ninja Foodi chicken recipe uses the pressure cooker and air fryer functions so it’s tender meat with crispy chicken skin on the outside when it’s done! Fresh or frozen, make this and our air fryer whole chicken recipe to see which is your favorite.
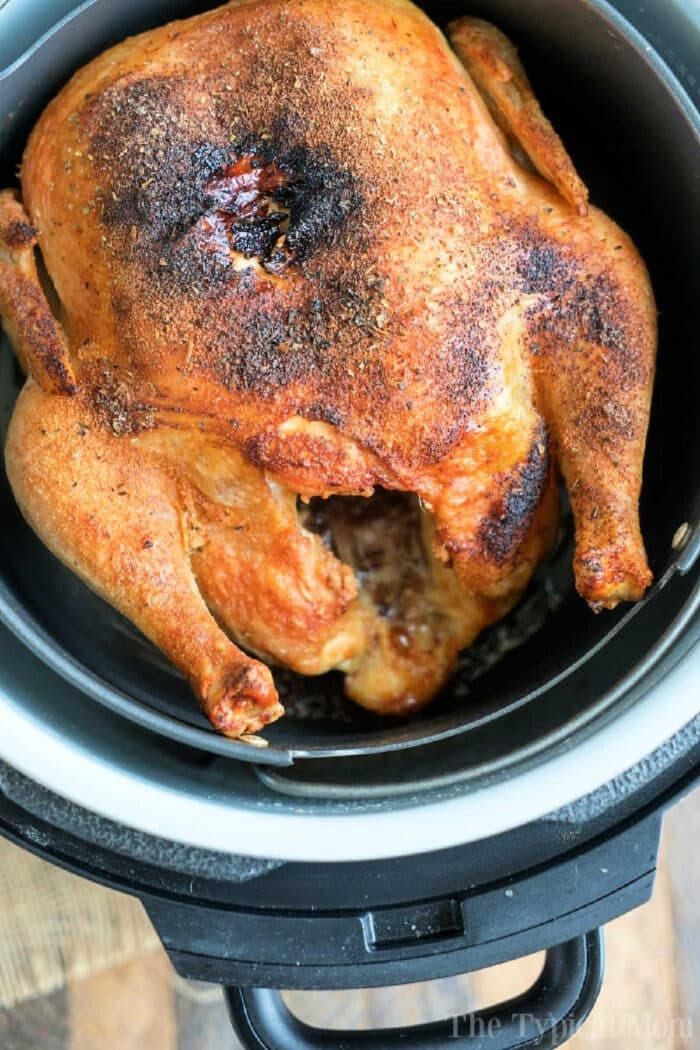
This is how to pressure cook and then air crisp with seasonings 5 ways. Cooking a whole chicken in a Ninja Foodi comes out fall-apart tender falling off of the bone to enjoy for dinner or shred and make tacos with.
How to Cook Whole Chicken in Ninja Foodi
There are TWO ways to do this. If you don’t want to pressure cook then follow our link above to use the air fryer lid. Below explains how to use both functions, both come out ultra tender and fantastic. Take your pick. We have a lot of easy and healthy Ninja Foodi recipes but this is the most popular.

Can you cook whole frozen chicken in Ninja Foodi?
You can actually and it doesn’t take long to get done. You would use the lid that is not attached with the high pressure function. Then follow our pressure cooker frozen whole chicken instructions and timing.
Let’s start with the liquid underneath. Since we’re using the pressure cooker method for this, it is required. You’re free to use broth or water with thyme and oregano like we chose to do. If only using air crisp with our air fryer bbq chicken breast recipe this wouldn’t be necessary. I add herbs to this as well as on to the chicken itself.
The choice is yours. This is what we rubbed on our whole chicken before we closed the lid. I cannot get enough garlic so that was a given. I seasoned the chicken with Lawry’s since that goes on just about everything too. Beyond that I kinda’ give it a pinch of this and a shake of that until the whole thing is covered.

We have created a lot of other healthy Ninja air fryer recipes but this one uses both of the main functions. Similar to our pressure cooker turkey breast. Both are gluten free and keto friendly too. Perfect for the holidays when you just have the two of you instead of a large crowd of guests.
How do you make gravy with the drippings?
What if you want to make gravy out of the drippings? I would suggest using chicken broth instead of water in the bottom then. It will create a richer flavor when done. You’ll get quite a bit of drippings during the cooking process though so either way will work. Follow these pressure cooker gravy directions.
Use arrowroot, this will make it gluten free too but still acts as a thickener for all the things. With very little flavor you will get the texture and consistency you want without flour.

If you don’t care about the skins at all just follow the directions here for a Instant Pot whole chicken. This is a great combination of both. You can really make the skin just like you like it with seasoning and olive oil spray like you see here.
How do you crisp the chicken skin?
After the pressure cooking time is up you will want to take off that lid and change to your air fry lid (one that is attached). Spray top with olive oil. You can season more at this time if desired. Push air crisp 400 degrees for 10 – 15 minutes. Cooking time depends on how crispy you want it but this typically is long enough.

Ninja Foodi Whole Chicken Recipe
Equipment
- 1 ninja foodi
Ingredients
- 4-5 lb chicken , whole
- 3 tbsp garlic, minced
- 1 tbsp thyme
- 1/2 tsp salt
- 1 tsp oregano
- 1 1/2 c water, for inside pot
- 1 tsp seasoned salt, Lawry's
Instructions
- Add your water, 2 tbsp of your minced garlic, 1 tbsp thyme, 1/2 tsp of salt and 1/2 tsp of oregano into your pot.
- Remove any bag that may be inside the cavity. Blot outside skin with paper towels to remove moisture. Rub 1 tbsp of minced garlic on to your chicken and sprinkle your seasoned salt all over your bird. Sprinkle remaining 1/2 tsp of oregano on chicken as well.
- Place inside your black air fryer basket breast side up, and put into your Ninja Foodi machine.
- Close your pressure cooker lid (the one not attached) and seal steam valve.
- Press pressure cook button, high, for 20 minutes.
- Allow to naturally release steam for 5 minutes, then release rest of steam. This is how to make gravy with drippings if desired.
- Remove lid. Spray top of chicken with olive oil (if you'd like to add more seasonings now go ahead).
- Close air fryer lid (one that is attached) and press air crisp button, 400 degrees for 10 minutes. Look after 10 (test with meat thermometer) and add more time depending on how crispy you like the skin.
- Lift out and allow to rest for at least 5 minutes so it stays juicy. Slice and serve.
Video
Nutrition
Nutrition information is automatically calculated, so should only be used as an approximation.
Other Ninja Foodi Meals You’ll Love
In case you didn’t know, you can easily translate any and all Instant Pot recipes to work in this ninja foodi pressure cooker and air fryer. Here are a few others you should try next:
- Ninja Foodi crack chicken!
- How to cook frozen chicken nuggets in an air fryer
- Ninja foodi french fries
Our air fryer chicken tenders no breading recipe is a low carb option as well. If you are looking specifically for air fryer dinner recipes we have that too. Tip: If you want REALLY crispy chicken skin then follow directions below but only pressure cook for 20 minutes, air crisp 400 for 20 minutes!


Love this recipe. It’s my go to for making a whole chicken. I change up the spices but follow the general instructions. It turns out perfect every time.
So glad
Didn’t mention the liquid in the pot.. did I miss it…
Has anyone tried stuffing the bird and if so how long did you cook it for?
Making this right now. Added couple different spices and doing 20 pressure cook & 20 air crisp. Thanks for sharing your wonderful recipes
How did it turn out cooking 20/20?
thanks the secret is letting the steam stay in – my chicken was so moist i added rosemary and lemon to the pot with a billion