
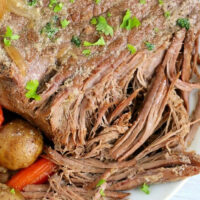
Our Ninja Foodi Roast Beef with potatoes and carrots recipe comes out incredibly tender! Forgot to defrost it first? NO problem, you can still follow our frozen roast in Instant Pot directions and it will come out melt in your mouth fork tender too.

This meal takes a lot less time than it ever has in the past. What once took all day to become fall apart tender now only takes about an hour. Try it! Then go on to make a few of our other easy Ninja Foodi recipes that will also be a dinner hit.
Sometimes you might come across a great deal at the store and want to give it a whirl, but just aren’t sure where to start. After you make this you will be very confident that dinner will be perfect every single time. Whether you slice it and serve over potatoes, or shred it and enjoy on sliders it’s always a winner of a dinner.
How Long to Cook Roast Beef in Ninja Foodi
It’s tricky cooking a large thick cut of meat. Now you can do it in about 60 minutes though!! This one uses the pressure cook function where as our air fryer roast beef would just use air crisp. They’re both delicious and you will see in just about an hour what I mean. 😉

We have few tips on how to make the best pressure cooker roast beef ever. I suggest you follow them for this cut, a tri tip, and any other thick piece. The first one has to do with the way you release the steam, that is key!
There are many different type of roasts out there as you know. You can use several varieties, some are less expensive than others. The cheapest would be air fryer chuck roast, which you can make in this machine too. I’d make both and decide for yourself which you prefer.
Best Roast to Use
If you want to use the best I suggest a top round roast like this one. It is a bit more expensive than others but packs in a bunch of flavor, lean, and shreds nicely if you want to do that. The cook time only varies depending on the weight, and if it is significantly larger than the size I used below. 50 minutes is about average though.
Like I said, this cut has a richer flavor than if you were to choose a cheaper variety. You can use a bottom round roast too if that is all your butcher has on hand. Chuck roast has more marbeling so take your pick. Our preference every time is to cook it longer in order to shred it with forks. That way it can be made into sliders, served over Ninja Foodi rice, or made into tacos.
You are going to start with the star of the show, a beef Roast. The timing below accounts for a 4 lb top roast or I have made this as an arm roast recipe at times too which is great but has a stronger beef flavor to it. You will want a bit of olive oil to brown the outsides first.
Best Vegetables to Add
As for vegetables I like to add firmer choices like russet Potatoes and carrots cut into quarters as well as a yellow or white Onion. I like to keep chunks large so they don’t get too soft.
Beef stock or broth are better than water, then you can make gravy at the end with it too so go with all the flavor.
Moving on to others, I add garlic garlic and more to everything I make at home. If you are sensitive to it than cut down the amount. Remember that you really need to add a lot of flavor to this otherwise bland piece of meat. The larger you cut the vegetables the firmer they will stay, but still will become soft. You don’t want a mushy mess so keep them big.

Do you need to brown roast before pressure cooking?
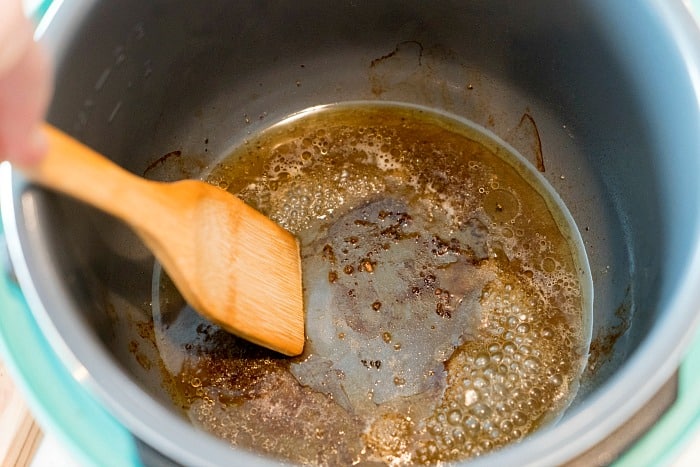
Yes this is an important step in order to lock in those juices. You can do this in the same pot on the saute function. The trick to this is that you need to deglaze pot after doing so to scrape off the stuck on bits or else you have the risk of the burn notice popping up and the pot will then stop working.
Frozen Roast Beef in Ninja Foodi
Believe it or not you use the same instructions even if rock hard. We share a link at the top of this post to how it is done but the only difference is we set it on a trivet as seen below with the liquid below. Under high pressure this does all the work for you. You can make a frozen roast in slow cooker too but that does take all day. Follow these basic instructions to make Instant Pot pot roast too, both pots work the same with pressure cooker mode.
When do you add the vegetables?
If you’re adding other ingredients to your Ninja Foodi roast recipe you will need to do that at the end. If you add them at the beginning and it takes a good hour to cook your meat they will be complete mush. The exception to this rule is with potatoes. We add them whole at the beginning when making our Ninja Foodi corned beef and cabbage. When left whole, and if they’re rather large, they will come out fall apart tender but still great.
In that recipe we use them as a trivet of sorts with the meat on top and they come out incredibly flavorful. SO you could put in whole taters at the get go but just realize they will become really soft and may be a bit mush when you take them out.
How to Make the Gravy
If you wanted to use the drippings for a quick pressure cooker gravy you could. Once veggies and meat are removed just set to saute with the lid off. In a dish put some of the hot liquid with a Tbsp of cornstarch or two. Whisk together and pour inside to thicken it nicely.
Tips for Success
That’s right. The #1 tip for cooking meat in a pressure cooker is to allow the steam to naturally release vs. a quick release. This will give you the tenderness you want. Another is if you want a bit of a char on the outside when it’s done, you’ll need to do this ahead of time.

Ninja Foodi Roast Beef Recipe
Equipment
Ingredients
- 3-4 lb roast, smaller or larger will just need slight adjustment for time
- 2 tbsp butter
- 2 tbsp olive oil
- 1 small onion, sliced
- 3 tbsp garlic, minced
- 1 cup beef broth
- 1/2 tsp salt
- 1/4 tsp pepper
- 1 tsp garlic salt
- 4 large carrots, cut into large chunks
- 4 small potatoes, cut into large chunks, or petite baby potatoes in a bag left whole.
- 2 tbsp worcestershire sauce
Instructions
- Put butter and oil into your foodi and set pot to saute setting.
- Season beef with salt, garlic salt and pepper liberally. When butter is melted add roast into pot and sear on each side until well browned. About 1-2 min. on each side. Turn pot off.
- Remove meat and deglaze pot by adding a bit of your broth and scraping bits of stuck on meat off bottom of your pot (so you avoid the WATER or burn notice)
- Set to saute again, add your onions into pot until they are softer and translucent, then add garlic and cook for 1 more minute. Turn off pot!
- Put beef back into your pot with onions, worcestershire sauce, and pour broth on top.
- Close pressure cooker lid (one that is not attached) and steam valve and set to high pressure for 50 minutes.
- Then allow steam to naturally release when done. Lift lid when steam is gone and add vegetables.
- Close lid again and set on high for 6 minutes. Then do a quick release. Lift lid and remove beef.
- Allow to rest for 5 minutes before slicing or shredding to serve. If you want to make gravy out of drippings in the pot set to saute again at the end once food is removed. In a bowl whisk 3 tbsp cornstarch with some hot liquid from pot. Whisk until smooth and add back in. Allow to bubble and thicken.
Video
Nutrition
Nutrition information is automatically calculated, so should only be used as an approximation.
If you want a great Ninja Foodi pot roast recipes we have those too. Using air crisp you can make air fryer pork roast, the other meat. This is a really cheap cut of meat but with a TON of flavor. Total winner of a dinner.


I have made this at least 5 times.!
It tastes just like my Mom’s growing up.
My fav!!
Thank you!
thank you!
When do you add the garlic salt please? Do you add it to the beef when you are seasoning it or do you add it to the pot along with the minced garlic?
Many thanks
Yes on the meat when seasoning it