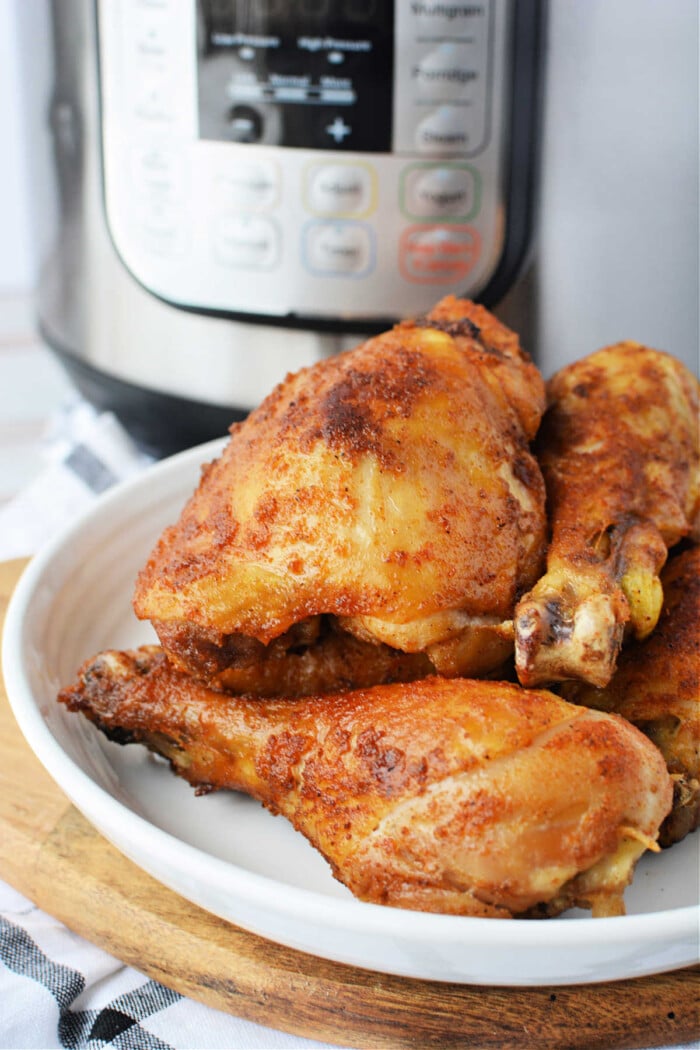
This is how to make pressure cooker fried chicken legs, thighs or breasts. You can make as a Ninja Foodi recipe or in an Instant Pot to create the most tender meat before you fry in oil to get super crispy skin.
We share a lot of easy Instant Pot recipes on our blog ever since we got one years ago. It gives us the ability to eat together more often with homemade meals which is the goal in our household. Yet again we have discovered a way to make our favorite foods faster and healthier.
Cooking Fried Chicken in a Pressure Cooker
Want the best of both worlds? The tenderness of Instant Pot Chicken Thighs Bone In but with the crisp and crunchy chicken skin we crave is what we are sharing here. It is possible! It does take one extra step but so worth it and from now on you will never have to settle for rubbery skin at the dinner table. 😉
Ninja Foodi Fried Chicken
If you have this multi-cooker you have another option too!! You can pressure cook Ninja Foodi chicken legs and then air crisp with the other lid to get crispy. OR you can follow our directions below to fry in oil on the stove. If you are focusing on super healthy in this case you can just spray olive oil on the top and get the same crunch, bonus!
Ingredient Notes
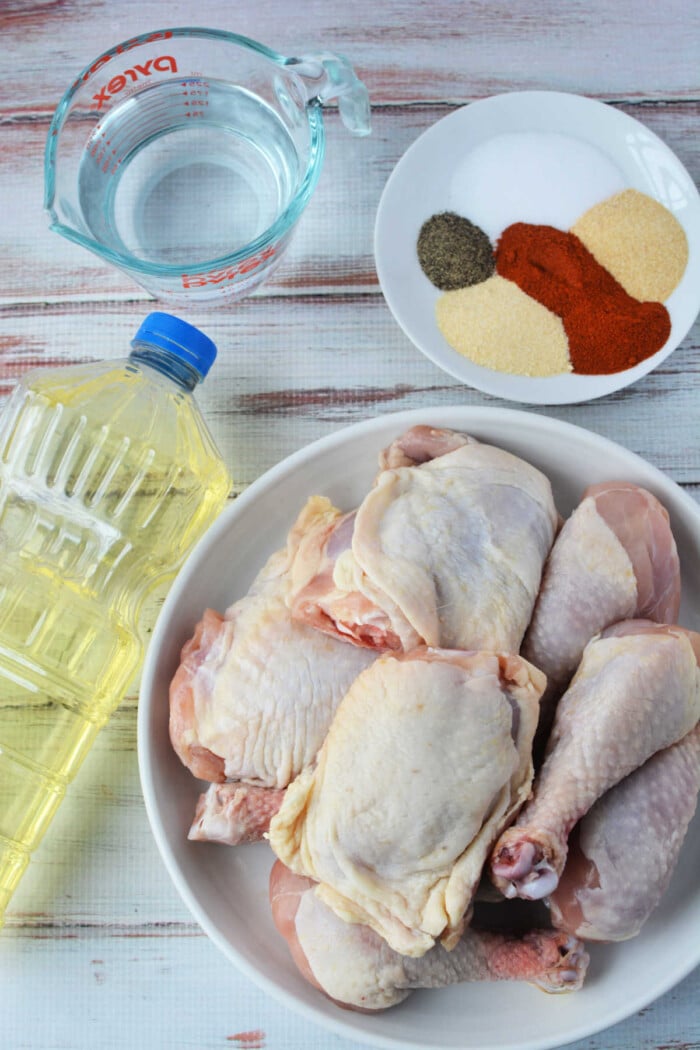
Typically I can fit 6-8 pieces chicken, bone-in, skin on, used thighs and legs. Use medium sized pieces so they overlap the least amount possible to allow the hot steam to circulate properly so each piece falls off the bone (almost).
As for seasonings I typically will go with some Paprika which gives them a pop of flavor, Onion powder and garlic powder, Salt and black pepper to taste
Vegetable oil is the best for frying and you will need some water or broth to steam legs under pressure
You are going to need the electric cooker of your choice, a trivet to keep the meat out of the steaming liquid too. A plate is handy to have as well as a skillet or deep fryer for the last few steps to crisp the skins once the legs, thighs and/or breasts reach a tender 165F.
Variations
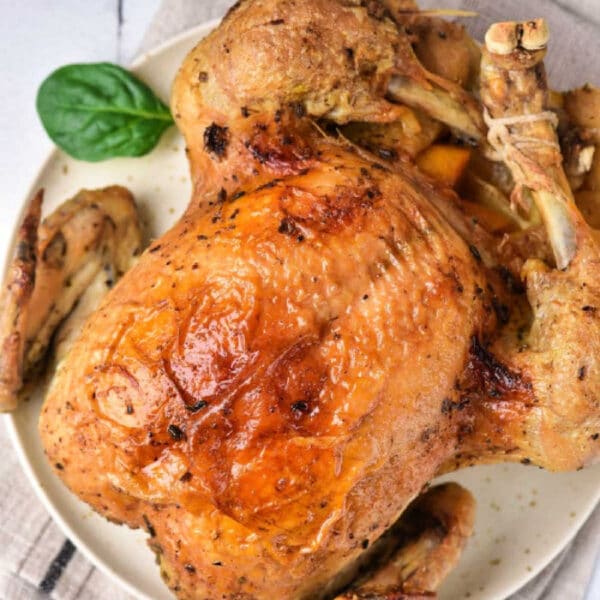
You are essentially making Pan Fried Chicken Legs when they are done in the IP. Here we made them with no breading.
If you really wanted to use breadcrumbs or flour like our Bisquick fried chicken you would need to cool enough to handle the pieces, dredge in eggs, then coating, and immediately fry in hot oil.
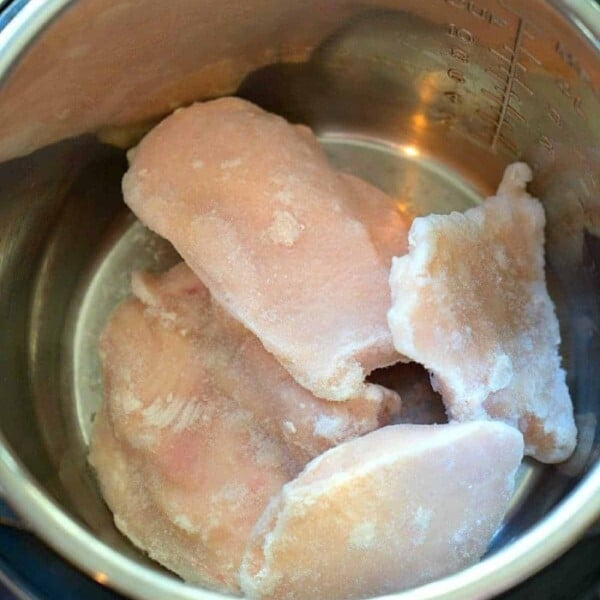
Can you make fried chicken with frozen chicken?
You could! Just follow our Frozen Chicken Legs Instant Pot recipe first so they are nice and tender. Then if you want to add seasonings you would want to cool enough to the touch. Preheat oil, dip pieces in a bit of egg, then roll into the seasoning blend and fry in hot oil as directed below.
How to Cook Fried Chicken in Instant Pot
There are two steps to get the insides as moist and tender as possible with crispy KFC style chicken once that is achieved. First you have to place trivet into Instant Pot and add water to steam them with pieces on top staggered.
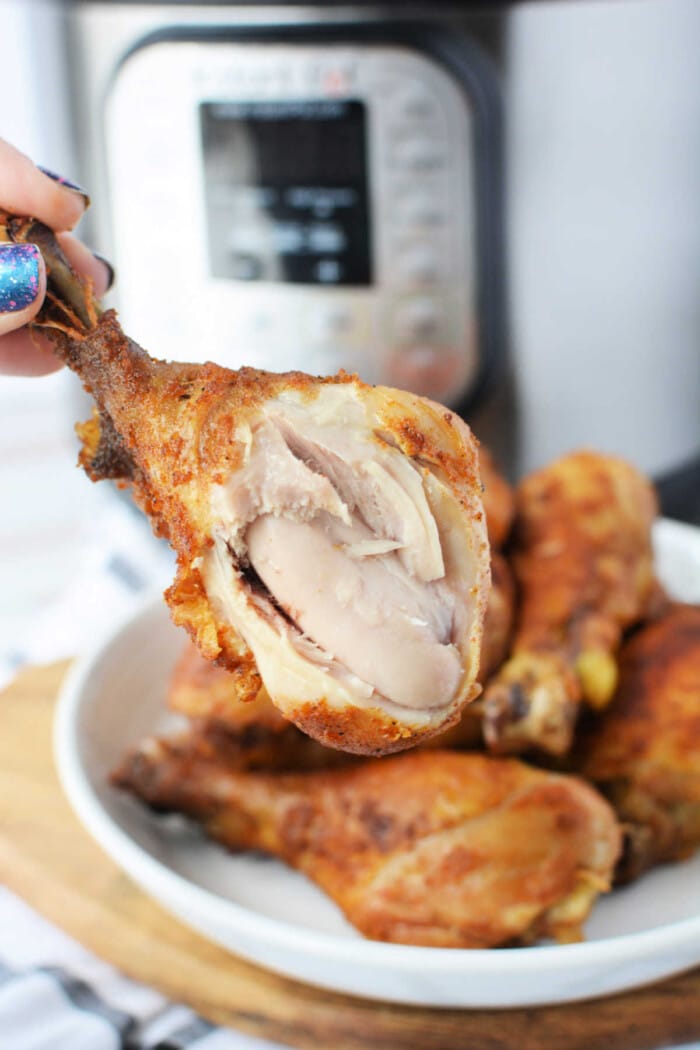
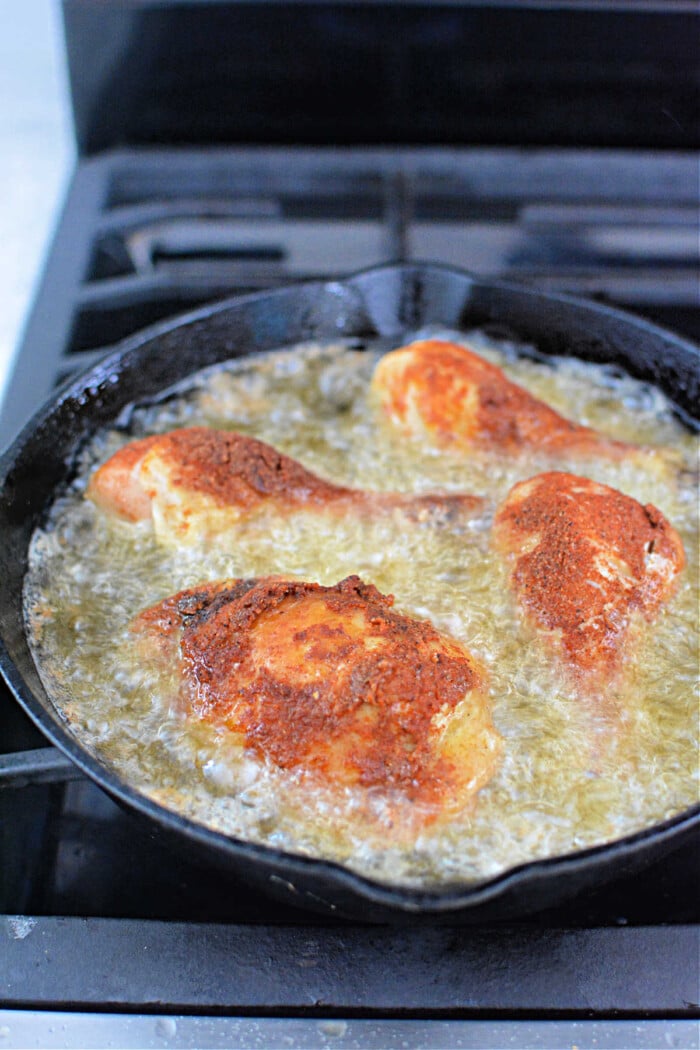
Then you need to cook at high pressure for 15 minutes, this will get pieces to reach a safe 165 degrees inside. Place onto paper towels to absorb moisture while oil heats.
How hot should oil be to fry chicken?
You do not want to add food until your oil reaches 360 degrees F. If you add before the meat will start to soak it in which will create a wierd flavor and won’t get it to crisp properly. Ideally you need to work in batches, with a few pieces into the oil and fry for about 3-5 minutes on each side or until crispy as you’d like.
If you are deep frying Pan Fried Chicken there is no need to flip and you can put more pieces in at a time. With that said you still want 30 seconds in between adding each one so they don’t stick together.
Tips on Making the Best Fried Chicken
As we have explained here you want to start with a technique that guarantees that you get the protein inside is as moist, juicy and tender as possible. Pressure cooking is the all time best way to achieve that so you are in the right place.
Once you have cooked the outside you want to make sure that the skin is dry. The easiest way to do this is have a plate lined with several paper towels handy so you can transfer them on top to absorb the moisture.
Always ALWAYS preheat your oil to 360 degrees F (350-375 range) while you are prepping things. You never (did I say never enough times) want to put in any food a pot to deep fry if it is lukewarm oil as it will just sit there and soak it in creating a mushy and not pleasant taste.
Whether you coat with a flour mixture or just seasonings you want to flip chicken pieces to evenly brown and crisp all over.
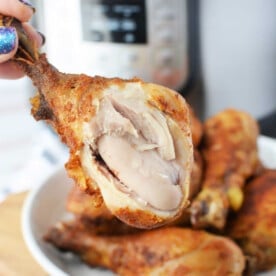
When done you will want to set fried chicken on paper towels to absorb excess oil for the crispiest skin. If this is skipped it will be absorbed and the outside will quickly become soft and rubbery.
Pressure Cooker Fried Chicken Recipe
Equipment
- 1 pan
Ingredients
Instructions
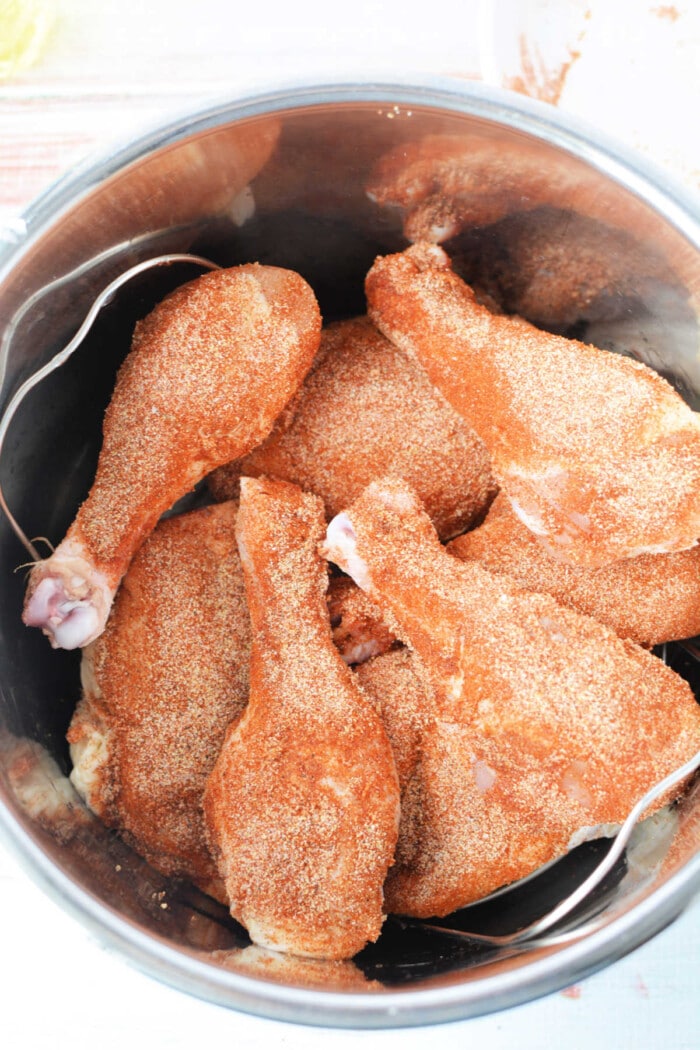
- Mix together paprika, onion powder, garlic powder salt and pepper. Generously sprinkle on chicken pieces and let them sit for 15 minutes.
- Place trivet into instant pot and add 1 cup of water. Place chicken on trivet, overlapping and stacking pieces if required.
- Put the lid on and seal shut. Close the pressure release valve and set to manual, high pressure for 15 minutes. When cooking cycle is complete, quick release and open. Remove chicken and place onto paper towels to absorb moisture on outside while oil heats.
- Add oil into a large skillet, making sure it's about 1/2" deep. Heat on medium high until it reaches 360 degrees F.
- Working in batches, place a few chicken pieces into the oil and fry for about 3-5 minutes on each side or until crispy. Drain on paper towel and serve.
Notes
Ninja Foodi Fried Chicken
If you do not want to fry in oil when done you can use the lid that is attached instead. Pressure cook as directed above and then set on paper towels to remove outside moisture. Drain liquid in pot and put legs (not overlapping) in air fryer basket. Close air crisp lid and set to 400 degrees for about 10 minutes. Check, if you want them crispier, set for a few more minutes. Remove this batch, put in the next and enjoy when they’re all done. ** Note, the subsequent batches will take closer to 8 minutes since it is already reheated to crisp.Nutrition
Nutrition information is automatically calculated, so should only be used as an approximation.
FAQ
No, that is not recommended. A pressure cooker is designed to trap steam and increase pressure, which raises the boiling point of water but does not allow oil to reach the high temperatures needed for deep frying.
There are two ways to do this. We show you one way here where we pressure cook chicken pieces to tender and then quickly fry in oil on the stove until skin is crispy to your liking. Another alternative is to preheat an air fryer, put in cooked chicken, spray with olive oil and “fry” for 6-8 minutes at 400F. that way.
No, this pot is meant to make food as tender as possible under high pressure. If you want a fried texture when done with that step you can certainly do so in oil or in an air fryer but frying in a pressure cooker isn’t a good idea.
You always always want to wait until oil has reached 360-375F. before adding your meat. This is the ideal temperature where the meat will not absorb the oil and won’t be too hot where it immediately burns either. Use a thermometer to submerge once it is steady at the ideal temp.