Our dehydrated chicken jerky recipe for dogs or humans is a healthy snack that is high in protein and great for camping or keto diets. If your pup loved our Boiled Chicken for Dogs they are going to enjoy this one too.

Our Dehydrated Dog Treats recipes were so popular I thought I would share how to work with chicken breasts that both humans and pets can enjoy. Marinate some for you in teriyaki sauce and leave theirs plain. What a way to bond!
How to Make Chicken Jerky for Dogs
This is just one way of How to cook Chicken Tenderloins sliced thin. You can of course use breasts or even thighs this same way but the smaller and thinner the better.
This recipe is a simple and cost-effective way to provide your furry friend with a tasty and healthy treat. From scratch allows you to control the ingredients and ensures that your baked or Air Fryer Dog Treats don’t have any added preservatives or artificial flavors. If you want to add extra flavor, you can marinate in dog-safe broth but that is optional.

Ingredient Notes
You may know how long to cook Thin Chicken Breast in Oven for dinner but this you actually want to dry out so it saves well for quite a while. When making for humans you would want to add seasonings, for animals that needs to be skipped.
- 1.5 lbs skinless chicken breasts sliced very thin
- if making for animals that is ALL you will use, NO seasonings
- 3 tsp nitrite salt not regular salt, curing salts
- 1 tsp granulated garlic
- 2 tsp smoked paprika
- 1 tsp black pepper
A dash of liquid smoke can give it a smoky flavor too if you like. Begin by preheating your oven to a low temperature, ideally around 170°F (75°C). A lower temperature helps dehydrate chicken without cooking it.
Whether you need Beef Jerky Time and Temp to make dog treats, or this one, always watch them to ensure they don’t swallow large pieces without chewing. This is a wonderful and wholesome snack for pets when fed in moderation as part of a balanced diet.

Can you dehydrate frozen chicken?
First off it is highly unlikely that you would find pieces already sliced this thin and then frozen. If you did find that they would be in one huge chunk and would have to be separated. If you were able to achieve all of that I suppose you could lay in a single layer and it would thaw as it heats but the moisture would make the lower levels wet.
This would make it take quite a few hours longer but yes the answer to the question would be yes, but that wouldn’t be ideal.
How Long to Dehydrate Chicken to Make Chicken Jerky
It takes quite a while and most will do this overnight since it takes a good 10 hours to do. Of course the timing will depend on how crisp you want it and more than that the thickness of your slices makes a big difference, the thinner the better if you ask me.


Chicken Jerky Recipe
Equipment
- 1 cutting board
- 1 knife
- 1 Bowl if marinating
Ingredients
- 1.5 lbs chicken, boneless, skinless sliced very thin
Chicken Jerky for Humans
- 3 tsp nitrite salt, not regular salt, curing salts
- 1 tsp granulated garlic
- 2 tsp smoked paprika
- 1 tsp pepper
Chicken Jerky for Dogs
- 2 cup dog safe broth, ONLY use this for 15 minutes to marinate
Instructions
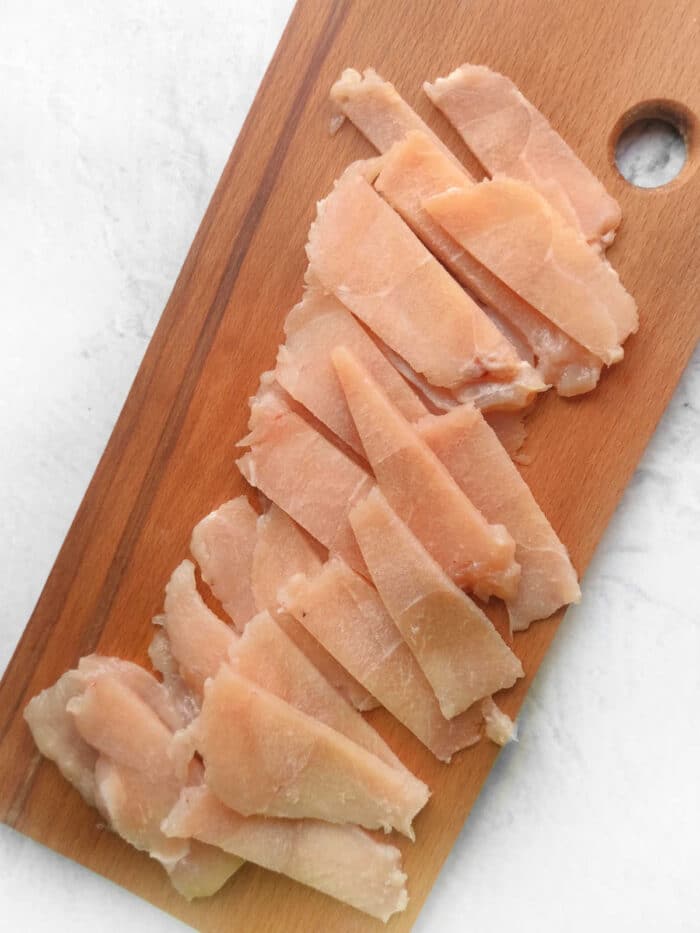
- Slice chicken breasts as thinly as possible across the fibers with a sharp knife. It is helpful to freeze the meat for an hour before slicing so it is firmer.
- If you are making for humans; Mix together the spices and nitrite salt. Place the prepared chicken in a plastic container, add the mixture. Mix the chicken pieces thoroughly. Cover the container with a lid and leave in the refrigerator for 8-10 hours to marinate. If making for dogs do not add any seasonings, you can use dog safe broth above for 15 minutes but optional.
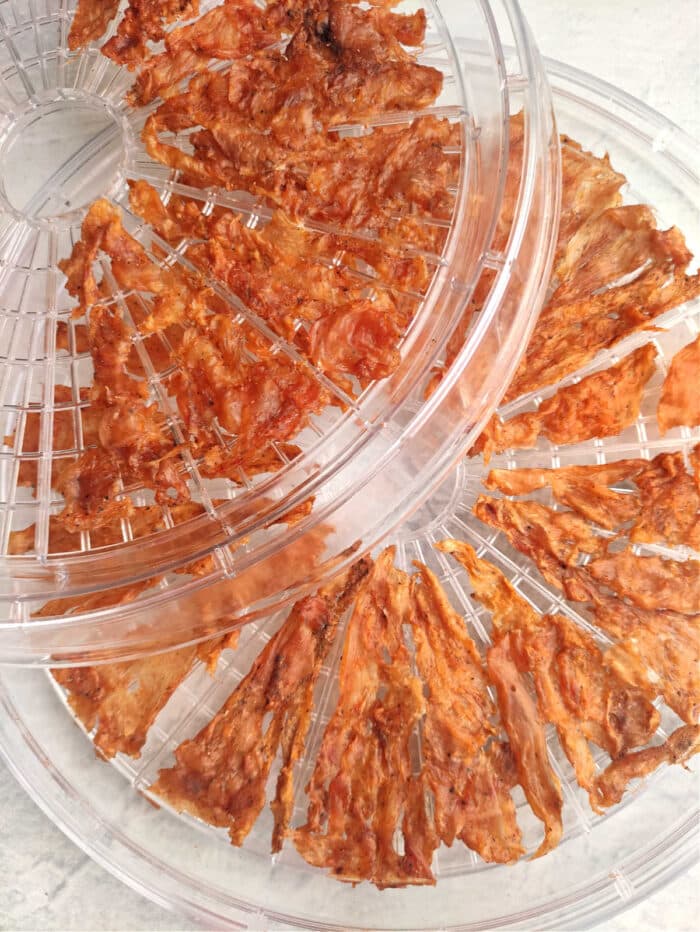
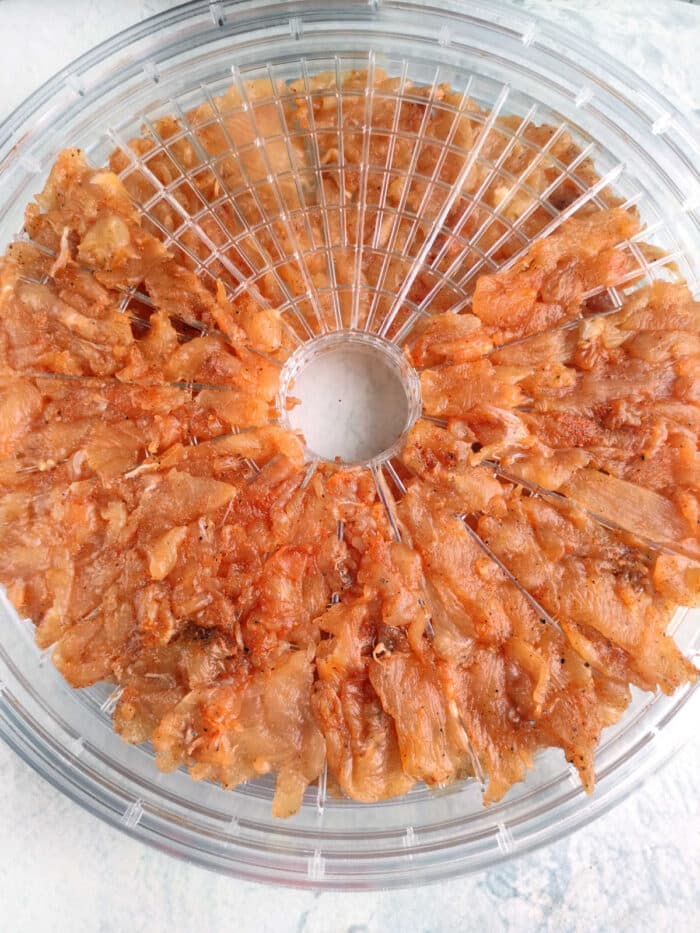
- Dehydrated chicken jerky in dehydrator – Place the chicken fillets on the dehydrator rack in a single layer. It is not necessary to grease the grid. Dry the jerky for 10 hours at 120 degrees Fahrenheit. The finished jerky should be translucent.
- Chicken jerky in oven – Preheat your oven to a low temperature, ideally around 170°F. Place the prepared chicken strips on baking racks that are set on top of baking sheets. Make sure the strips are spread out and not touching. Put the baking sheets with the racks of chicken into the preheated oven. Bake for several hours, typically around 2-3 hours or until they become dry and firm. The exact time can vary based on your oven's temperature and the thickness of the chicken slices. You can prop the oven door open slightly with a wooden spoon to help air circulation and speed up the drying process.
Video
Nutrition
Nutrition information is automatically calculated, so should only be used as an approximation.
How to Save Homemade Jerky
To properly save homemade chicken jerky and extend its shelf life, follow these steps: Allow to cool completely after making it. This helps prevent condensation inside the storage container, which can lead to spoilage. Use airtight containers or resealable plastic bags designed for food storage. Make sure they are clean and dry before using them to store the pieces.
If you’re doing some batch cooking with a lot of it, divide it into smaller portions. This way, you won’t need to expose the entire batch every time you want to enjoy some. To prevent the pieces from sticking together, place parchment paper or wax paper between each layer inside the container.
Write the date on the containers to help you keep track of the jerky’s age. Homemade jerky typically has a shorter shelf life than commercially produced jerky, so it’s essential to know when you made it.
This should be stored in either the refrigerator or freezer. If you plan to consume it within a week or two, the refrigerator is suitable. For longer storage, use the freezer. In the refrigerator, it can stay good for up to 1 to 2 weeks. Keep it in the main compartment of the refrigerator, not the door, as temperatures are more consistent there.
For longer storage, place the chicken jerky in the freezer. Properly stored, it can last for up to 3 to 6 months in the freezer. To prevent freezer burn, ensure the container is airtight and consider using a vacuum sealer for added protection. When you’re ready to enjoy the frozen chicken jerky, thaw it in the refrigerator overnight or defrost it in the microwave using the defrost setting. Avoid leaving it at room temperature for an extended period as this can lead to bacterial growth.
Always check the jerky for signs of spoilage, such as an off smell, mold, or changes in texture or appearance before consuming. If you notice any signs of spoilage, discard it immediately. Properly stored homemade chicken jerky should be safe to eat, but when in doubt, it’s best to err on the side of caution.


