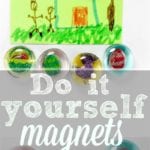
How to make picture magnets with just a few items. Really fun birthday party activity that is cheap and you can create photo magnets with them too!

Your kids are always wanting to do projects and activities with you right?? Sometimes coming up with projects that are easy and inexpensive are a bit tough after a long week of work, but this one is really fun and useful too. If you’d like to know how to make picture magnets that your kids can design themselves and use them to hold up their school work (or give as a gift), here is an easy way to create them.
- It’s a fun kids activity that can be done at home, in the classroom, or with a group of kids during Girl Scouts or a birthday party!
Custom Photo Magnets
We have done a lot of fun projects at home on the weekends like making edible playdough. Seasonal activities like making an egg carton flag and other kids crafts are fun too.
These do it yourself magnets are fun because you can display any sort of picture in them. They can hold up pictures on the fridge too! Making these at a birthday party would be fun, and use them as their party favors! Provide stickers, paper to draw on, or you could use small photographs too!
Here is what you will need:

How to make Picture Magnets
- Clear glass stones
- Sticky magnet sheet
- Stickers or small photographs
- Clear glue
Directions:
- Trace circles using the stones and cut out the paper circles.
- Next, stick a sticker on each paper circle then add a little glue to the back side of the stone and place design on the stone.
- Using the design paper to cut out circles and glue to the stones.
- Then on the front of the stone, glue on googly eyes to create little bugs if you want that creation.
- Stick a magnetic piece on the back of each stone.
- Let magnets completely dry before use.
- Now just decorate your fridge with them. Fun for kids!
Great occasions to make these:
- Classroom art project
- Homemade Christmas presents
- Girl Scout project
- Weekend art activity
- Or this other popsicle stick magnet craft


Make your sensory bottles even more exciting with some help from magnetic bottle fillers. All you need is an empty plastic bottle, some paperclips or other magnetic material (washers, nuts, or magnetic discs or a little bit of everything!) and water to fill the bottle. Show your little one how the metal pieces will follow the magnet, and even stick to the other pieces in the bottle. Ask them to see how far they can hold the wand away from the bottle while still making the pieces move. Who knew learning about magnetic fields could be so fun?