Our recipe for boneless chuck roast in oven falls apart when done! Super tender with juices you can make gravy with. Delicious high protein meal that is family friendly served over a bed of mashed potatoes or as sliders.
Jump To
I use this cut of beef a lot but without a bone is my favorite of them all. You get more meat, less prep work overall, and when you are a busy home cook this is super important. If you are new to it you are in for a treat and slow cooking is key to the perfect bite.
How Long to Cook Boneless Chuck Roast in Oven
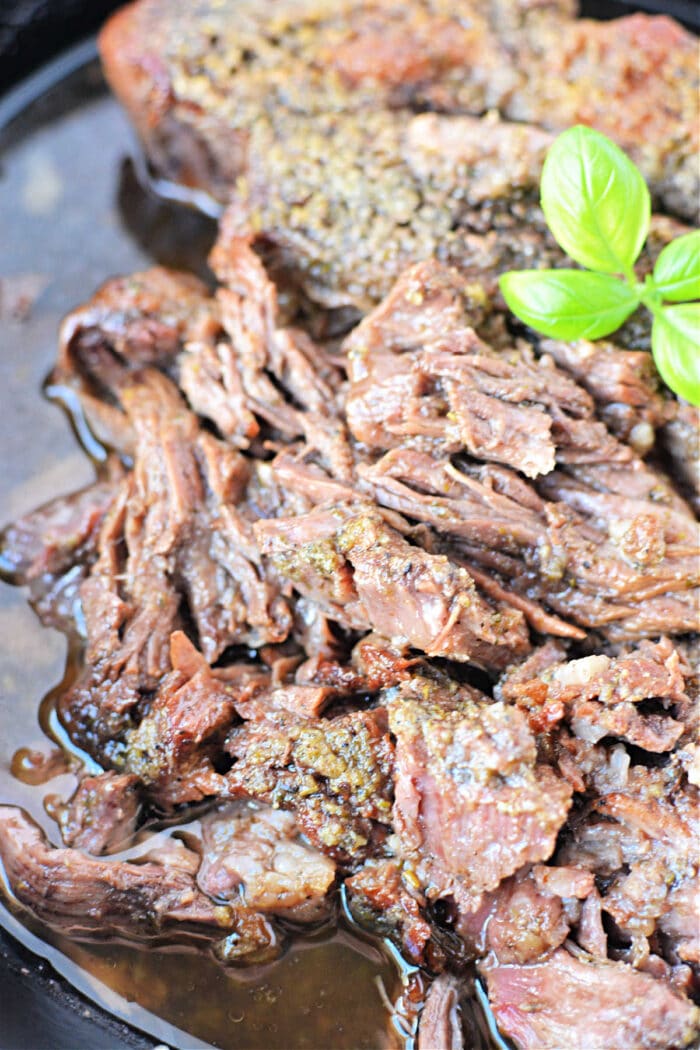
On the first go around we baked chuck roast in the oven at 350 for a little less time which was great, but sliced. This time I wanted it so fork tender you could make shredded with no effort at all so I decreased the temp to 325F and at 2.5 hours it was perfect!!
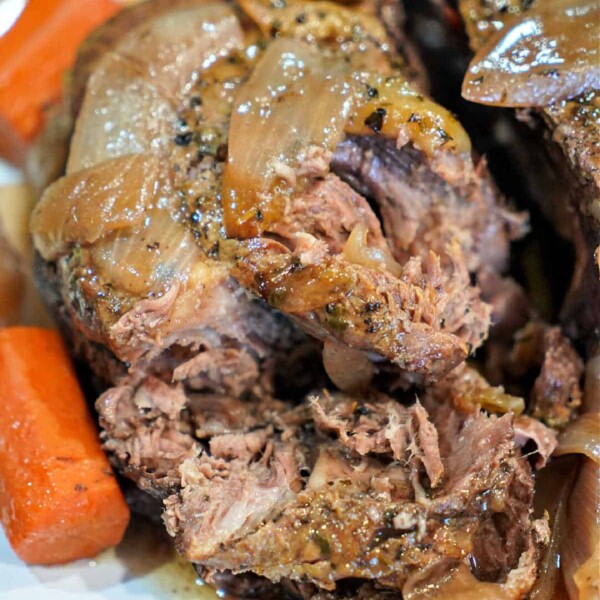
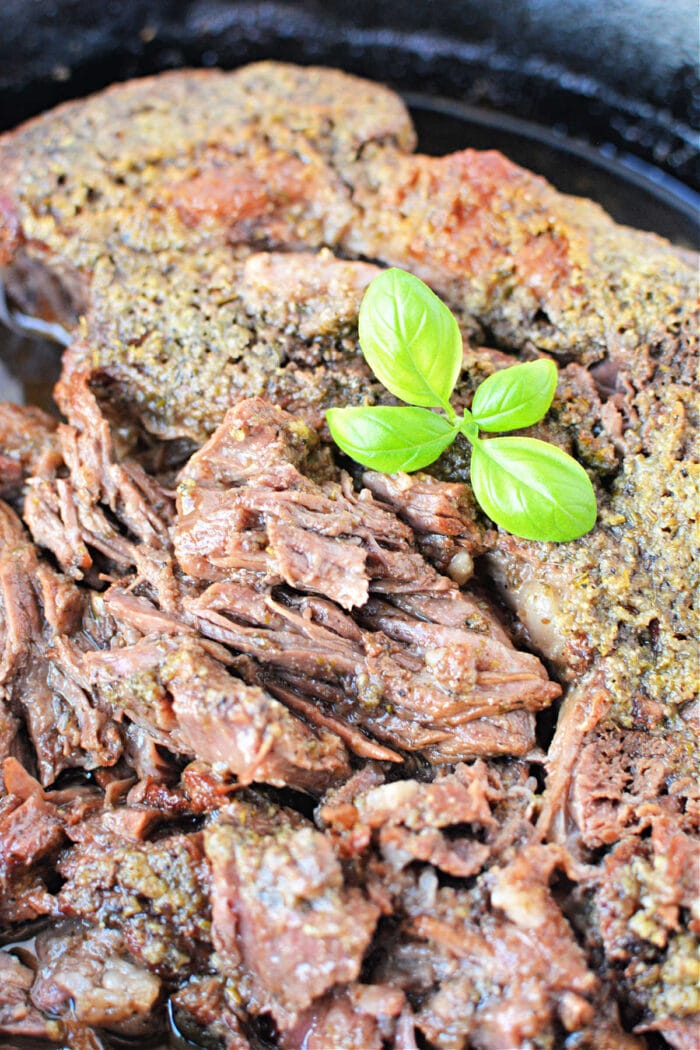
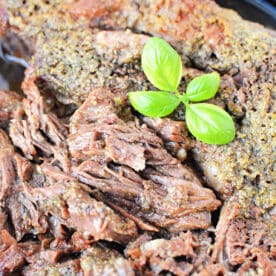
In the past we have made chuck roast burnt ends with this same cut but now it was time to leave it whole. I wanted a melt-in-your-mouth texture this time and that is just what I got! With a simple dry rub it added a ton of flavor we loved and simple enough to make any day of the week.

How to Cook Frozen Boneless Chuck Roast
If you realize that you forgot to defrost your meat, no worries because we have directions on how to cook Frozen Roast in the Oven for you here. There isn’t that big of a difference in the steps, just a bit longer cook time is all. 😉
Ingredient Notes
You want to use a good 3 pound beef chuck roast boneless, give or take a few ounces is just fine. The cook time listed below is appropriate for this size. Any larger and you would need to increase that time.
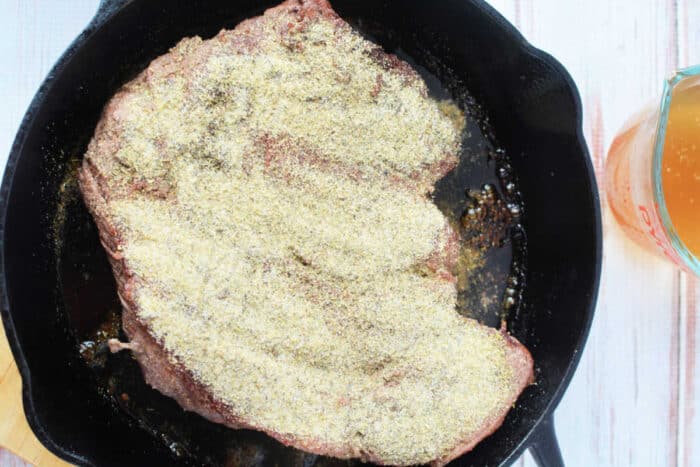
A little bit of oil is necessary to sear in the first step. This is important to create a sort of crust to lock in the moisture and become as fork-tender as possible especially if you want it shredded.
You will need some beef broth to steam the meat essentially and break down the connective tissues.
And you want some simple seasonings to give it more flavor such as; chopped fresh rosemary, thyme, salt and pepper, garlic powder etc….
If you want to make Roast with Onions you can slice 1/2 into thick slices and sprinkles on the sides too.

How to Season
If you wanted bolder flavors I would go with our tri tip dry rub recipe for the outside. It has a sweet and savory flavor to it. You could use butter instead of oil if you preferred, or a dairy free alternative.
You could use the liquid and seasonings in our Mississippi pot roast recipe for another tweak on the flavors. Meaning the temperature and timing will stand true but feel free to vary the flavors for several different meals with the same base.
Chuck shoulder pot roast or Chuck Roll Steak are other names for this same cut. In case you don’t find a package that says boneless chuck roast, it may be labeled in this way instead so keep that in mind. If all you can find is it’s bone-in variety you can certainly use this same recipe, you will just have to remove that when done and before serving.
Cook Time Per Pound
Overall timing for this or our Boneless Rib Roast is about 45 minutes per pound. Of course that is depending on the size, meaning the thicker it is the longer it will take to reach a fall apart tender status. Cooking without a bone is not only faster but you create a more even heat so the outside doesn’t get more dry than the center which is nice.
At what temperature does chuck roast fall apart?
You want the internal temperature to reach about 195°F to 205°F (or 90 – 96 degrees C) in order for this cut of beef to shred easily. This is the range where the collagen and connective tissue break down into gelatin, making the meat super tender.

How to Thicken the Gravy
There will be a fair amount of juices in the pan when done. If you want to make cream of mushroom gravy with it you would remove meat, set over medium high heat on the stove and whisk juices together with a can of condensed soup. Otherwise you can whisk in cornstarch to make thicker and season as you’d like.
Do you have to sear beef before baking?
Yes this is highly suggested in order sear the seasonings on to the outside, to lock in the juices when it is baking to make it as tender as possible, and give it a bit more texture overall. If it is skipped it won’t be ruined but won’t be the ideal outcome.
If yours is frozen you wouldn’t be able to do this, so you’d skip that step. However with a fresh piece of beef it is best. The reason it is suggested is that searing will lock in the juices with that initial browning so the end result will be more moist. It won’t be ruined if you don’t, and not necessary with air fryer chuck roast either.
Boneless Chuck Roast Recipe
Equipment
- 1 cast iron skillet or roasting pan
- aluminum foil
Ingredients
- 3 pound boneless chuck roast
- 2 tbsp vegetable oil
- 1/2 cup beef broth
Dry Rub
- 1 tsp onion powder
- 1 tsp garlic powder
- 1 tsp Italian seasoning
- 1/2 tsp salt and pepper
Instructions
- Preheat oven to 325 degrees F. Add oil to an ovenproof skillet and heat over medium high heat. When hot, add beef roast and heat on both sides, about 4 minutes each, or until browned. Remove from heat.
- Mix together onion powder, garlic powder, Italian seasoning, salt and pepper and sprinkle on top of roast in skillet. Gently pour broth around roast, avoiding the top.
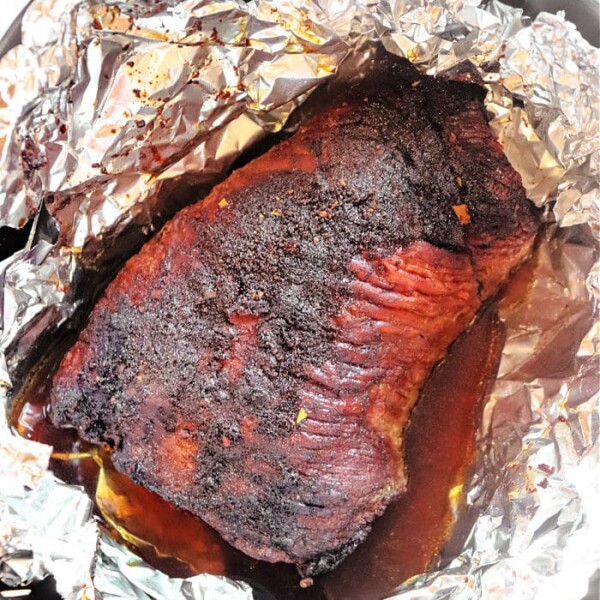
- Cover tightly with foil and roast for 30 minutes at 325 degrees F. After 30 minutes, keep roast in oven and reduce heat to 300 and continue to cook for 2 hours. Remove from oven and let stand 10 minutes before serving/shredding.
Nutrition
Nutrition information is automatically calculated, so should only be used as an approximation.
How do you serve Chuck Roast?
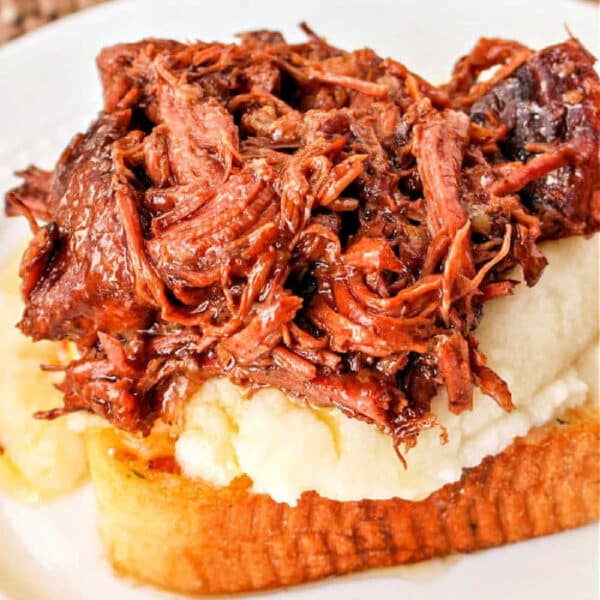
What I do with this is I will bake spaghetti squash whole in my lower oven or on a small sheet pan next to this. When done you can shred the “noodles” out and serve together for an all together low carb high protein meal. Many prefer a bed of mashed potatoes or with Hardees Biscuits for the Old Fashioned presentation, but really any side dish goes with beef recipes if you ask me.
When saving leftovers you want to keep as much of the juice with it. Once cooled transfer into a sealed container with everything left in the pan. You will want this when reheating so it doesn’t dry out so don’t get rid of it when saving!